
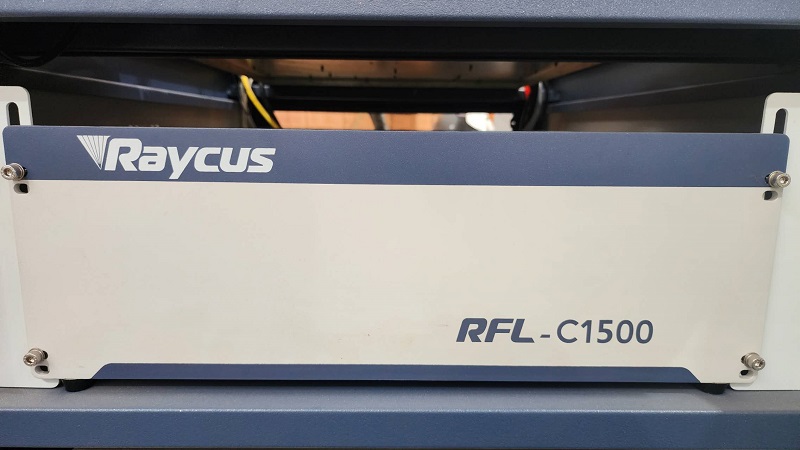
Raycus laser source alarms
In some cases needed to troubleshoot Raycus laser source for alarms. This alarms can be cleared in many cases with a dedicated software for Raycus source monitoring.
This software can be downloaded here
Raycus fiber laser source uses a DB9 serial port for communication. Usually a USB to serial converter needed for PC connection.
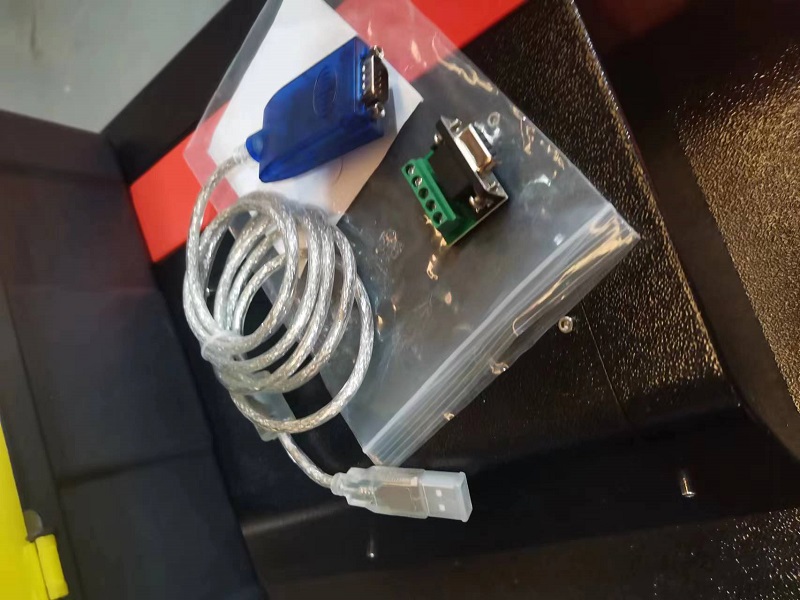
An especial serial communication cable comes with each Raycus laser source.
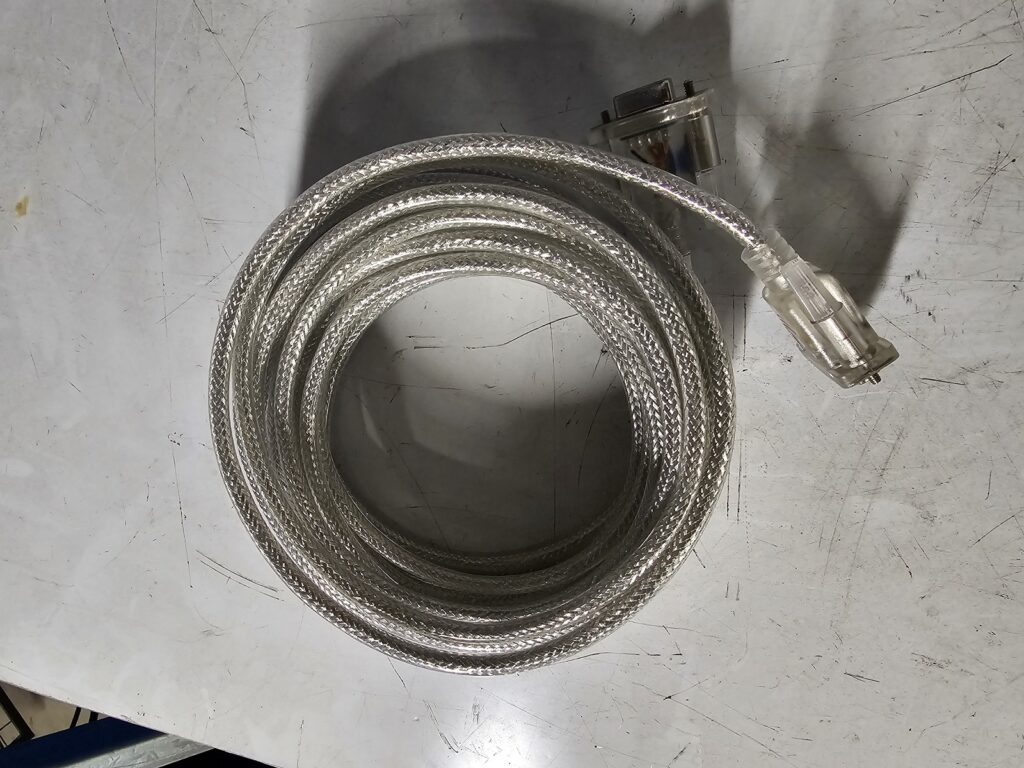
The serial cable’s pinout mentioned in the table below:
| DB9 female | DB9 female |
|---|---|
| 1 | 1 |
| 2 | 3 |
| 3 | 2 |
| 4 | 6 |
| 5 | 5 |
| 6 | 4 |
| 7 | 8 |
| 8 | 7 |
| 9 | 9 |
After extracting the software package, needs to run RFLXXXS.exe as administrator, Then in session menu, select RS232
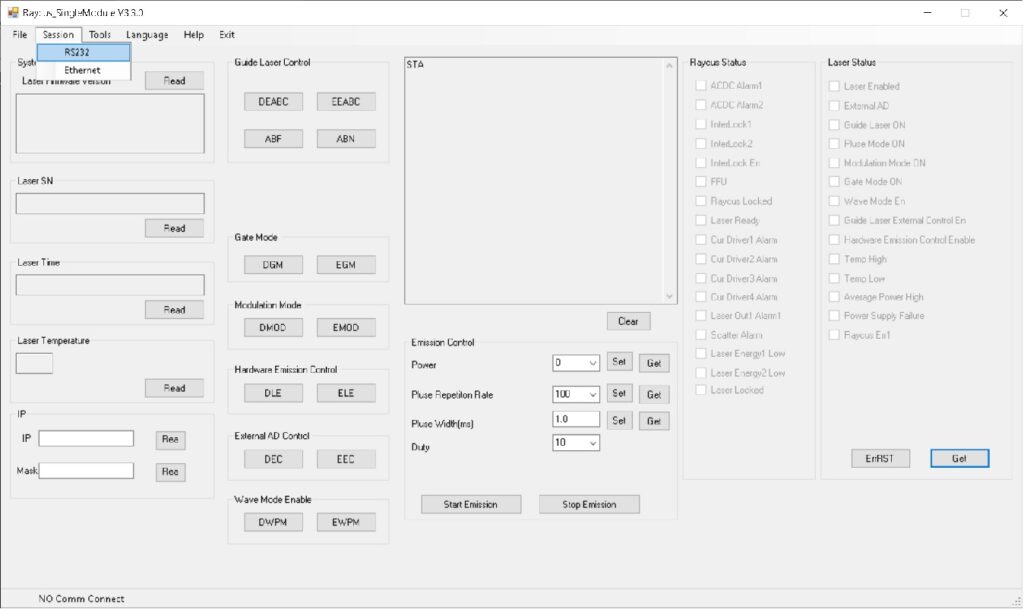
Then get com port and open, as below
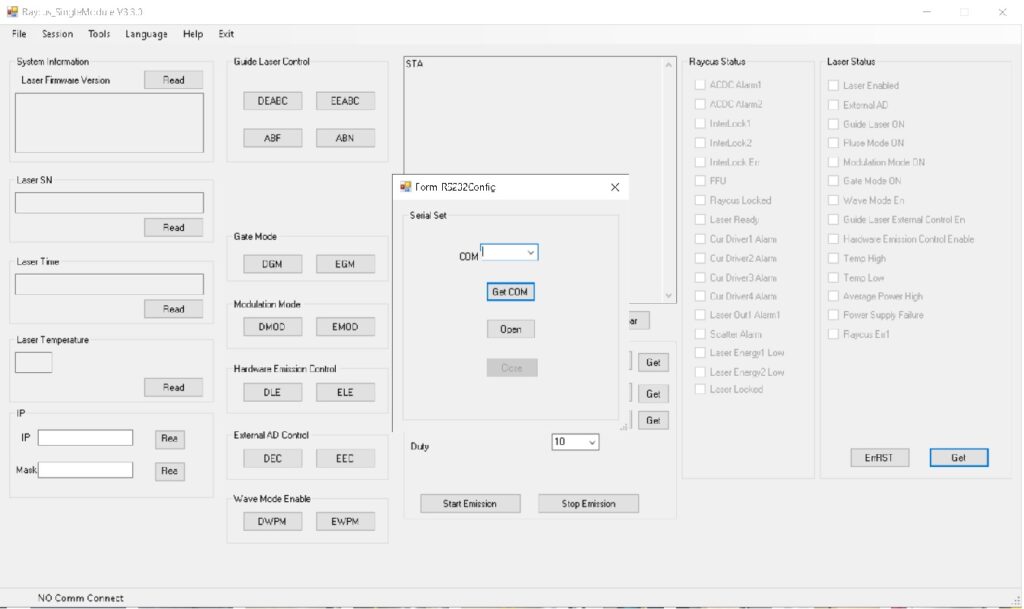
You can check communication by pressing Read button:

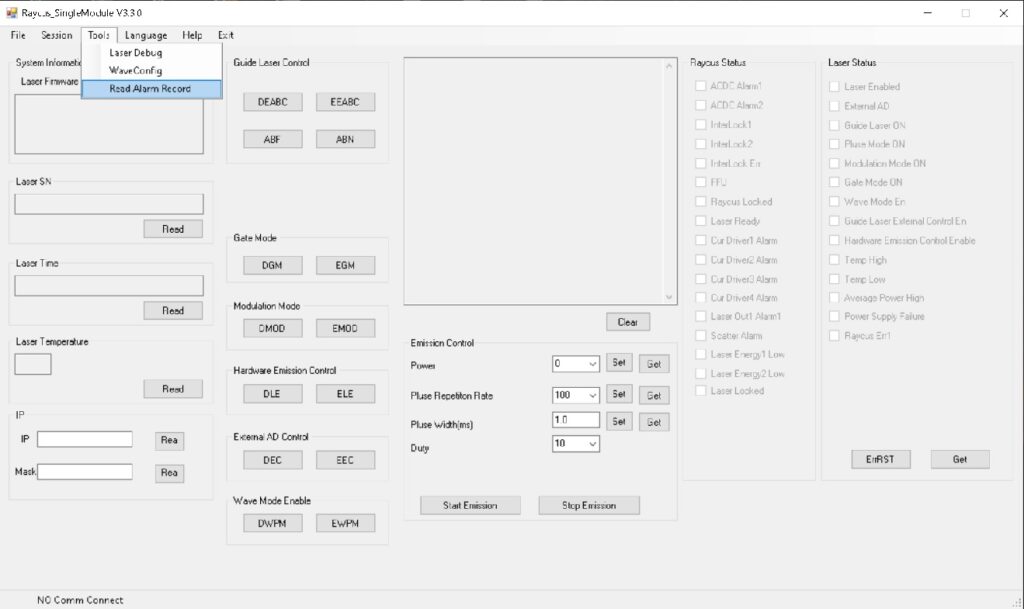
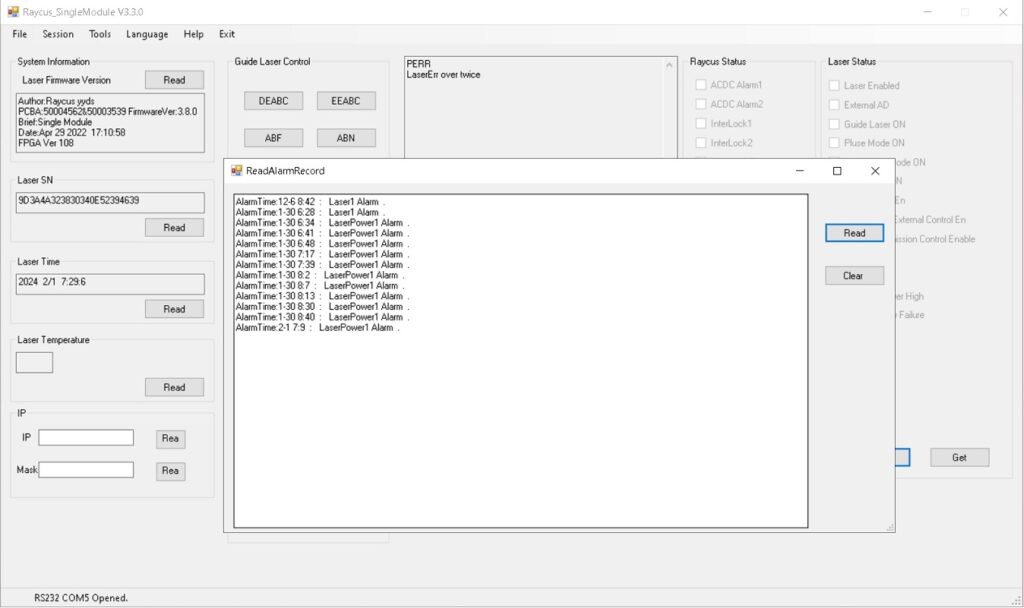
From tools menu, open “Read alarm record”
Then press “read” and “clear”
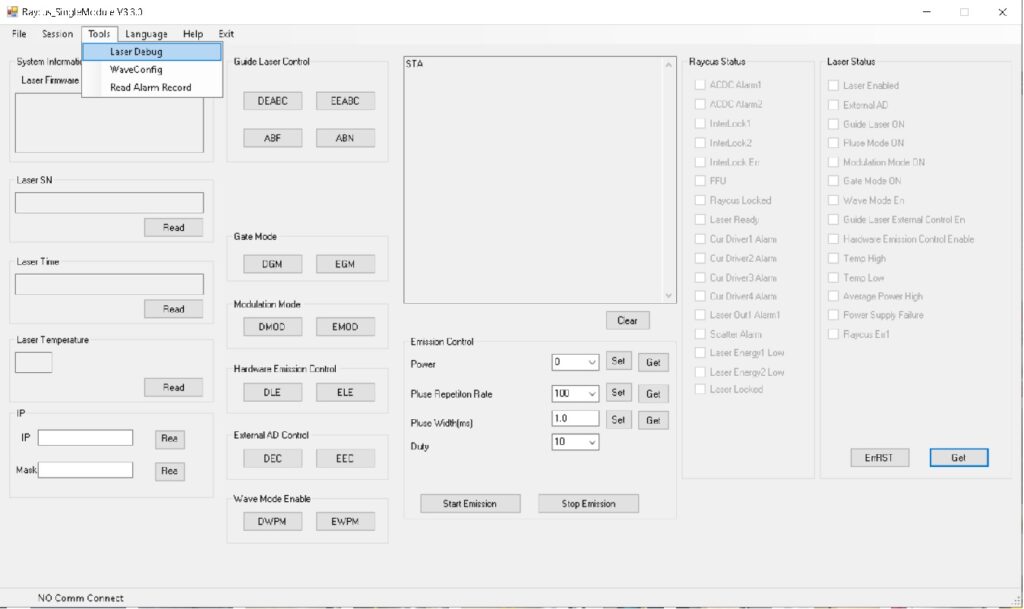
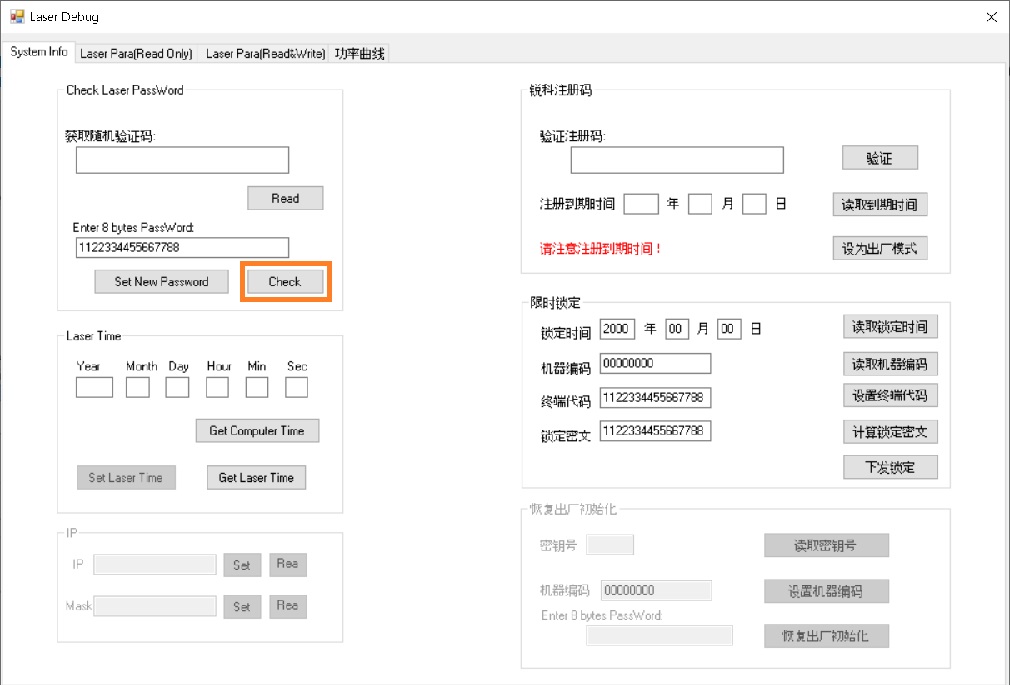
Tools menu, “laser debug”
Password is 1234
Then click “check”
Select Laser para (Read only)
Then click:
- Clear Alarm Record
- Clear Laser On time
- Get
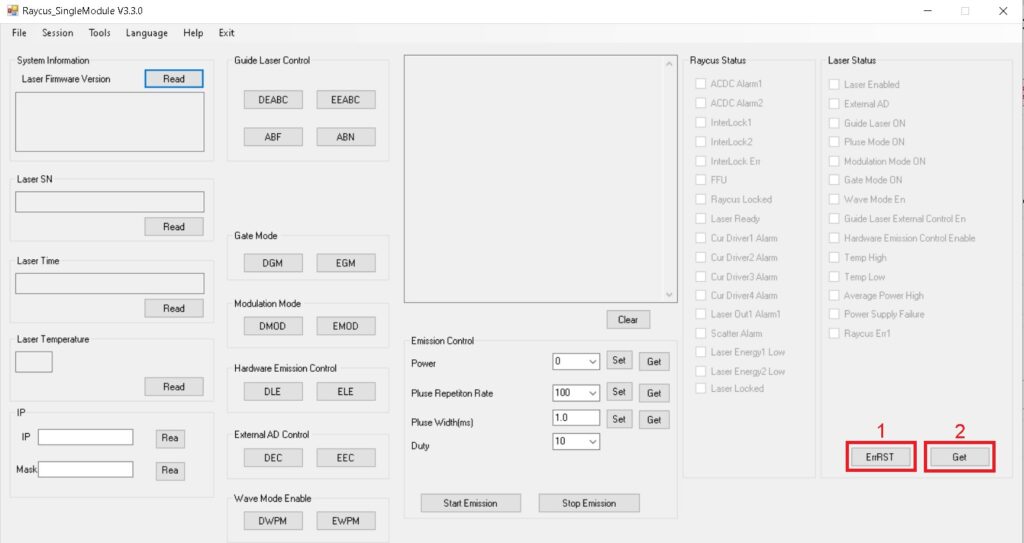
Then click “ErrRST” then “Get” in the main page


No comment